Your net worth, on your own machine.
Connects Wallet, Zerodha, Groww and INDmoney through your coding assistant, then shows what actually grew and what you simply added. It runs in your browser. No account, no server, no cloud.
The demo runs in your browser on invented numbers. Nothing is sent anywhere.
Everything you own, in one place.
Net worth, allocation against your targets, performance across every asset, and where your money goes. Rendered here with invented numbers.
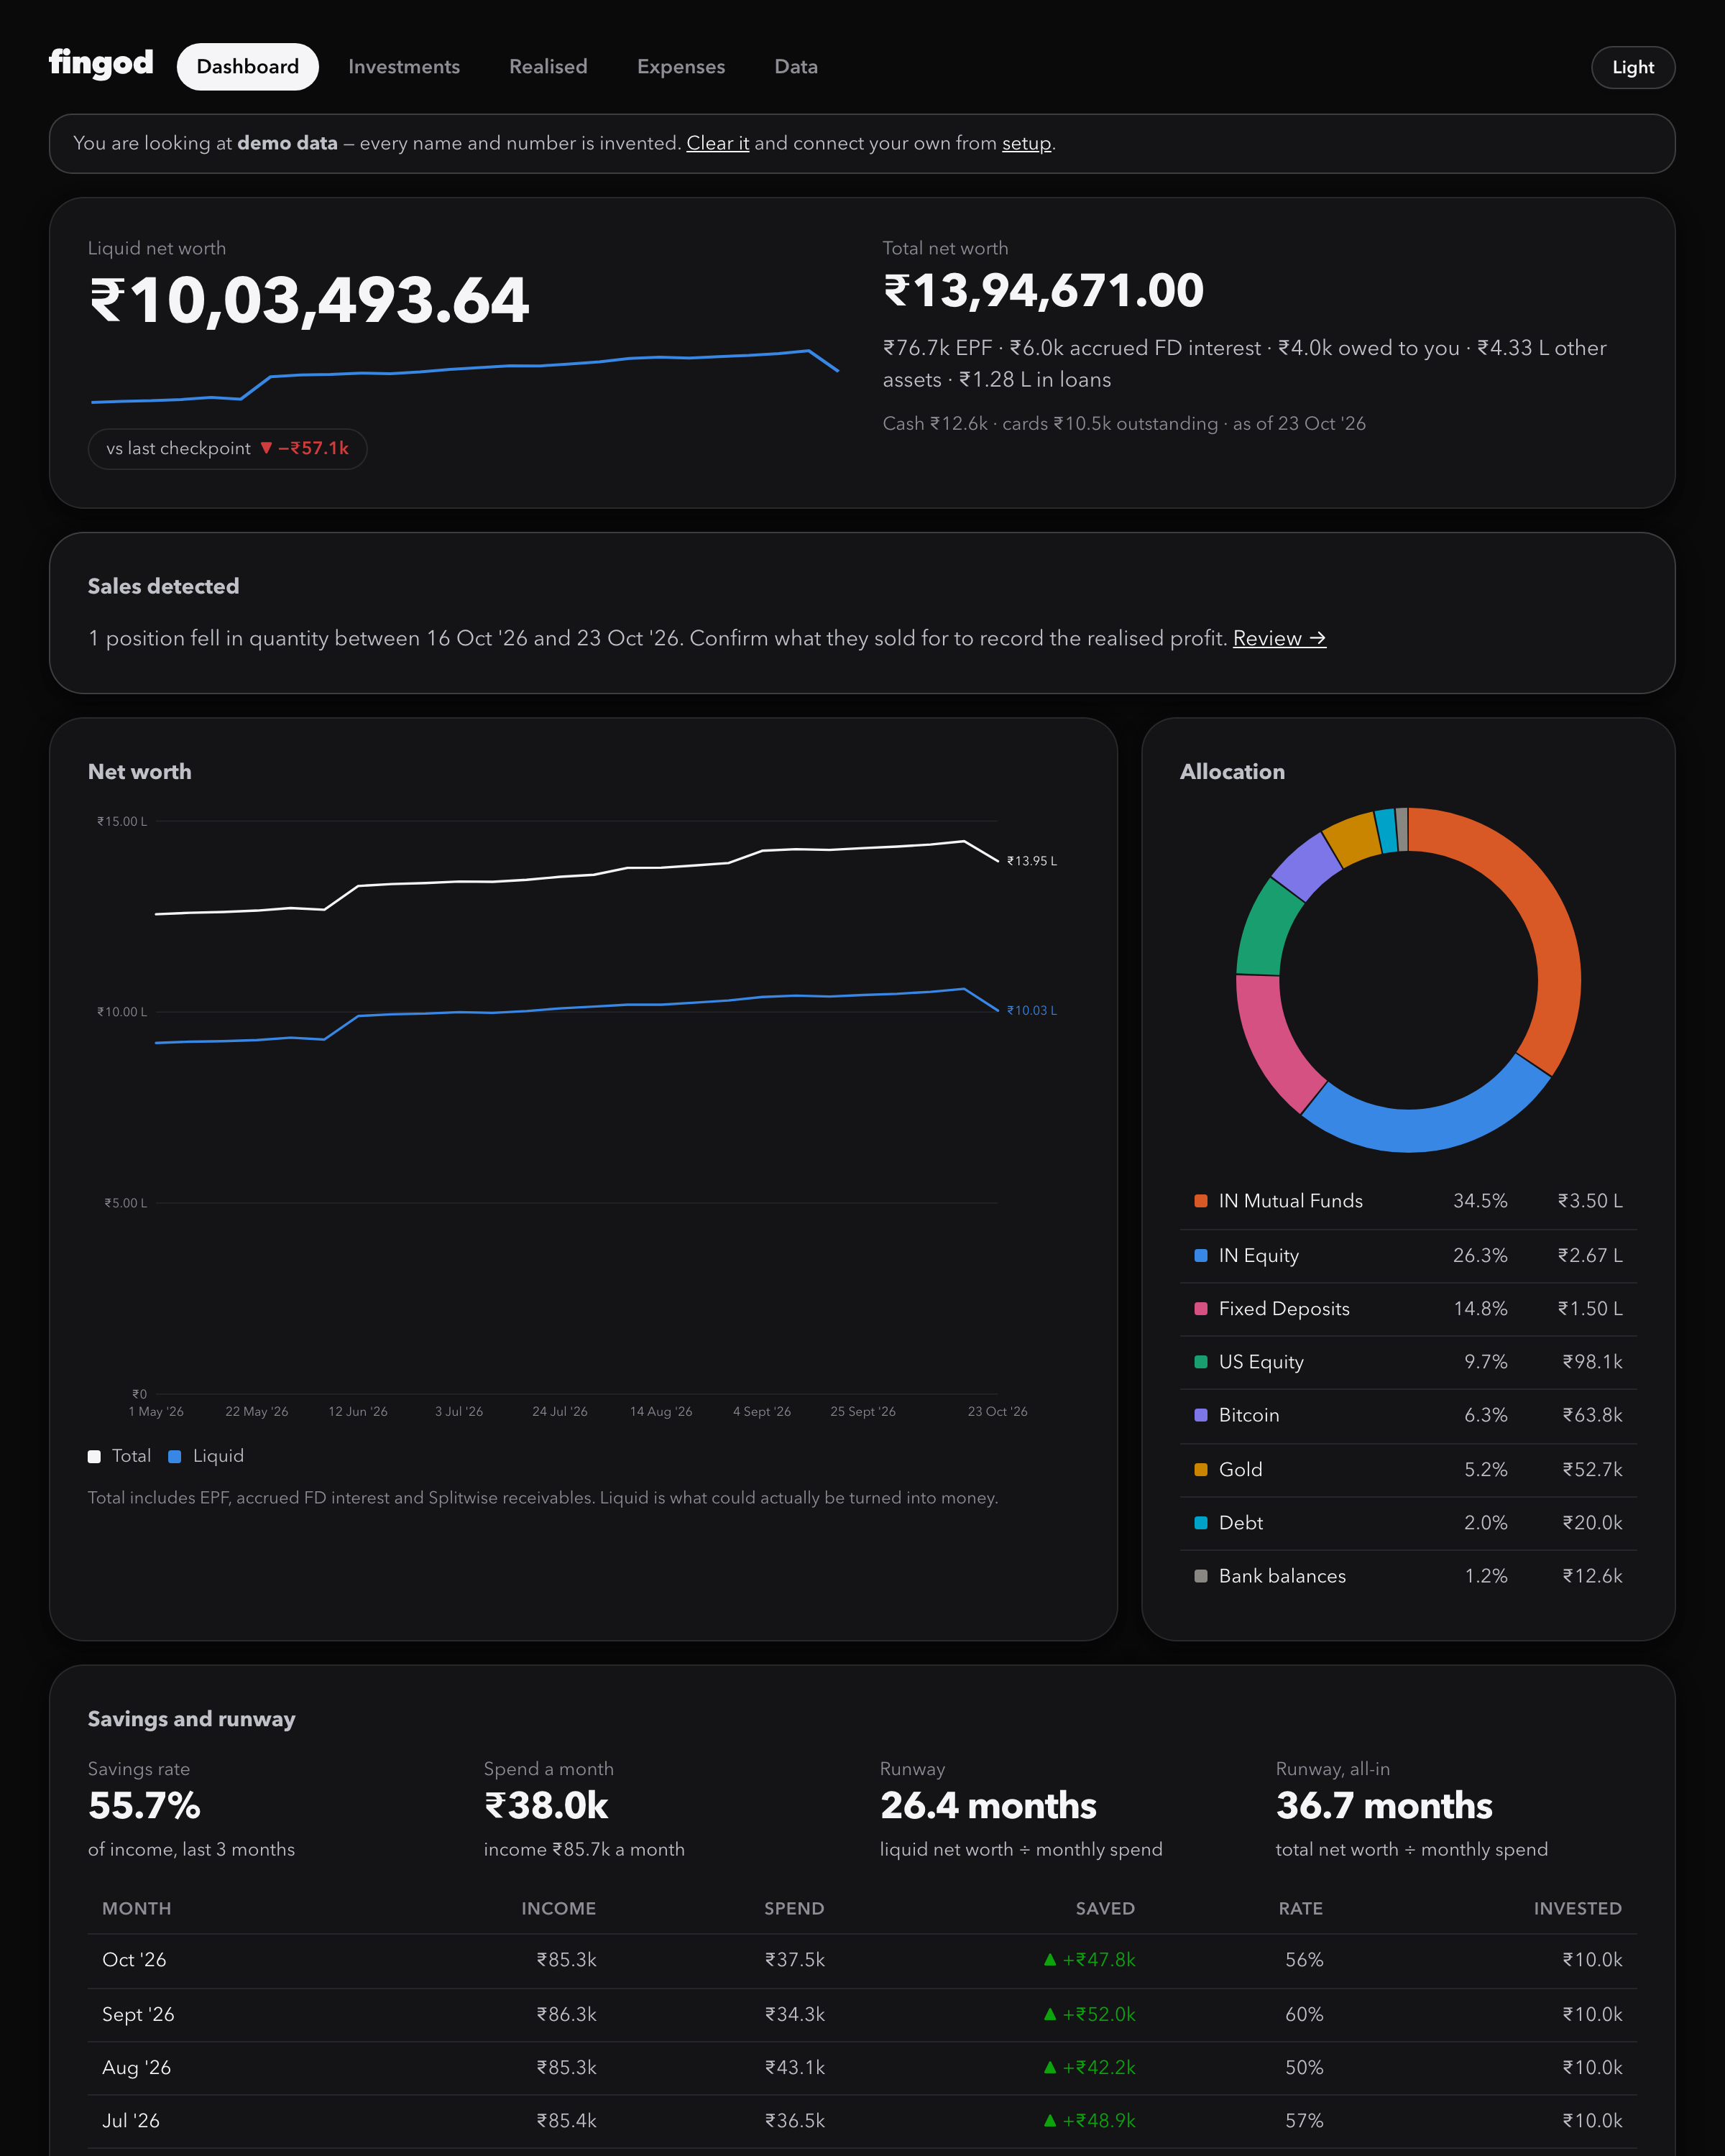
Dashboard: liquid and total net worth, allocation, and monthly spend by label.
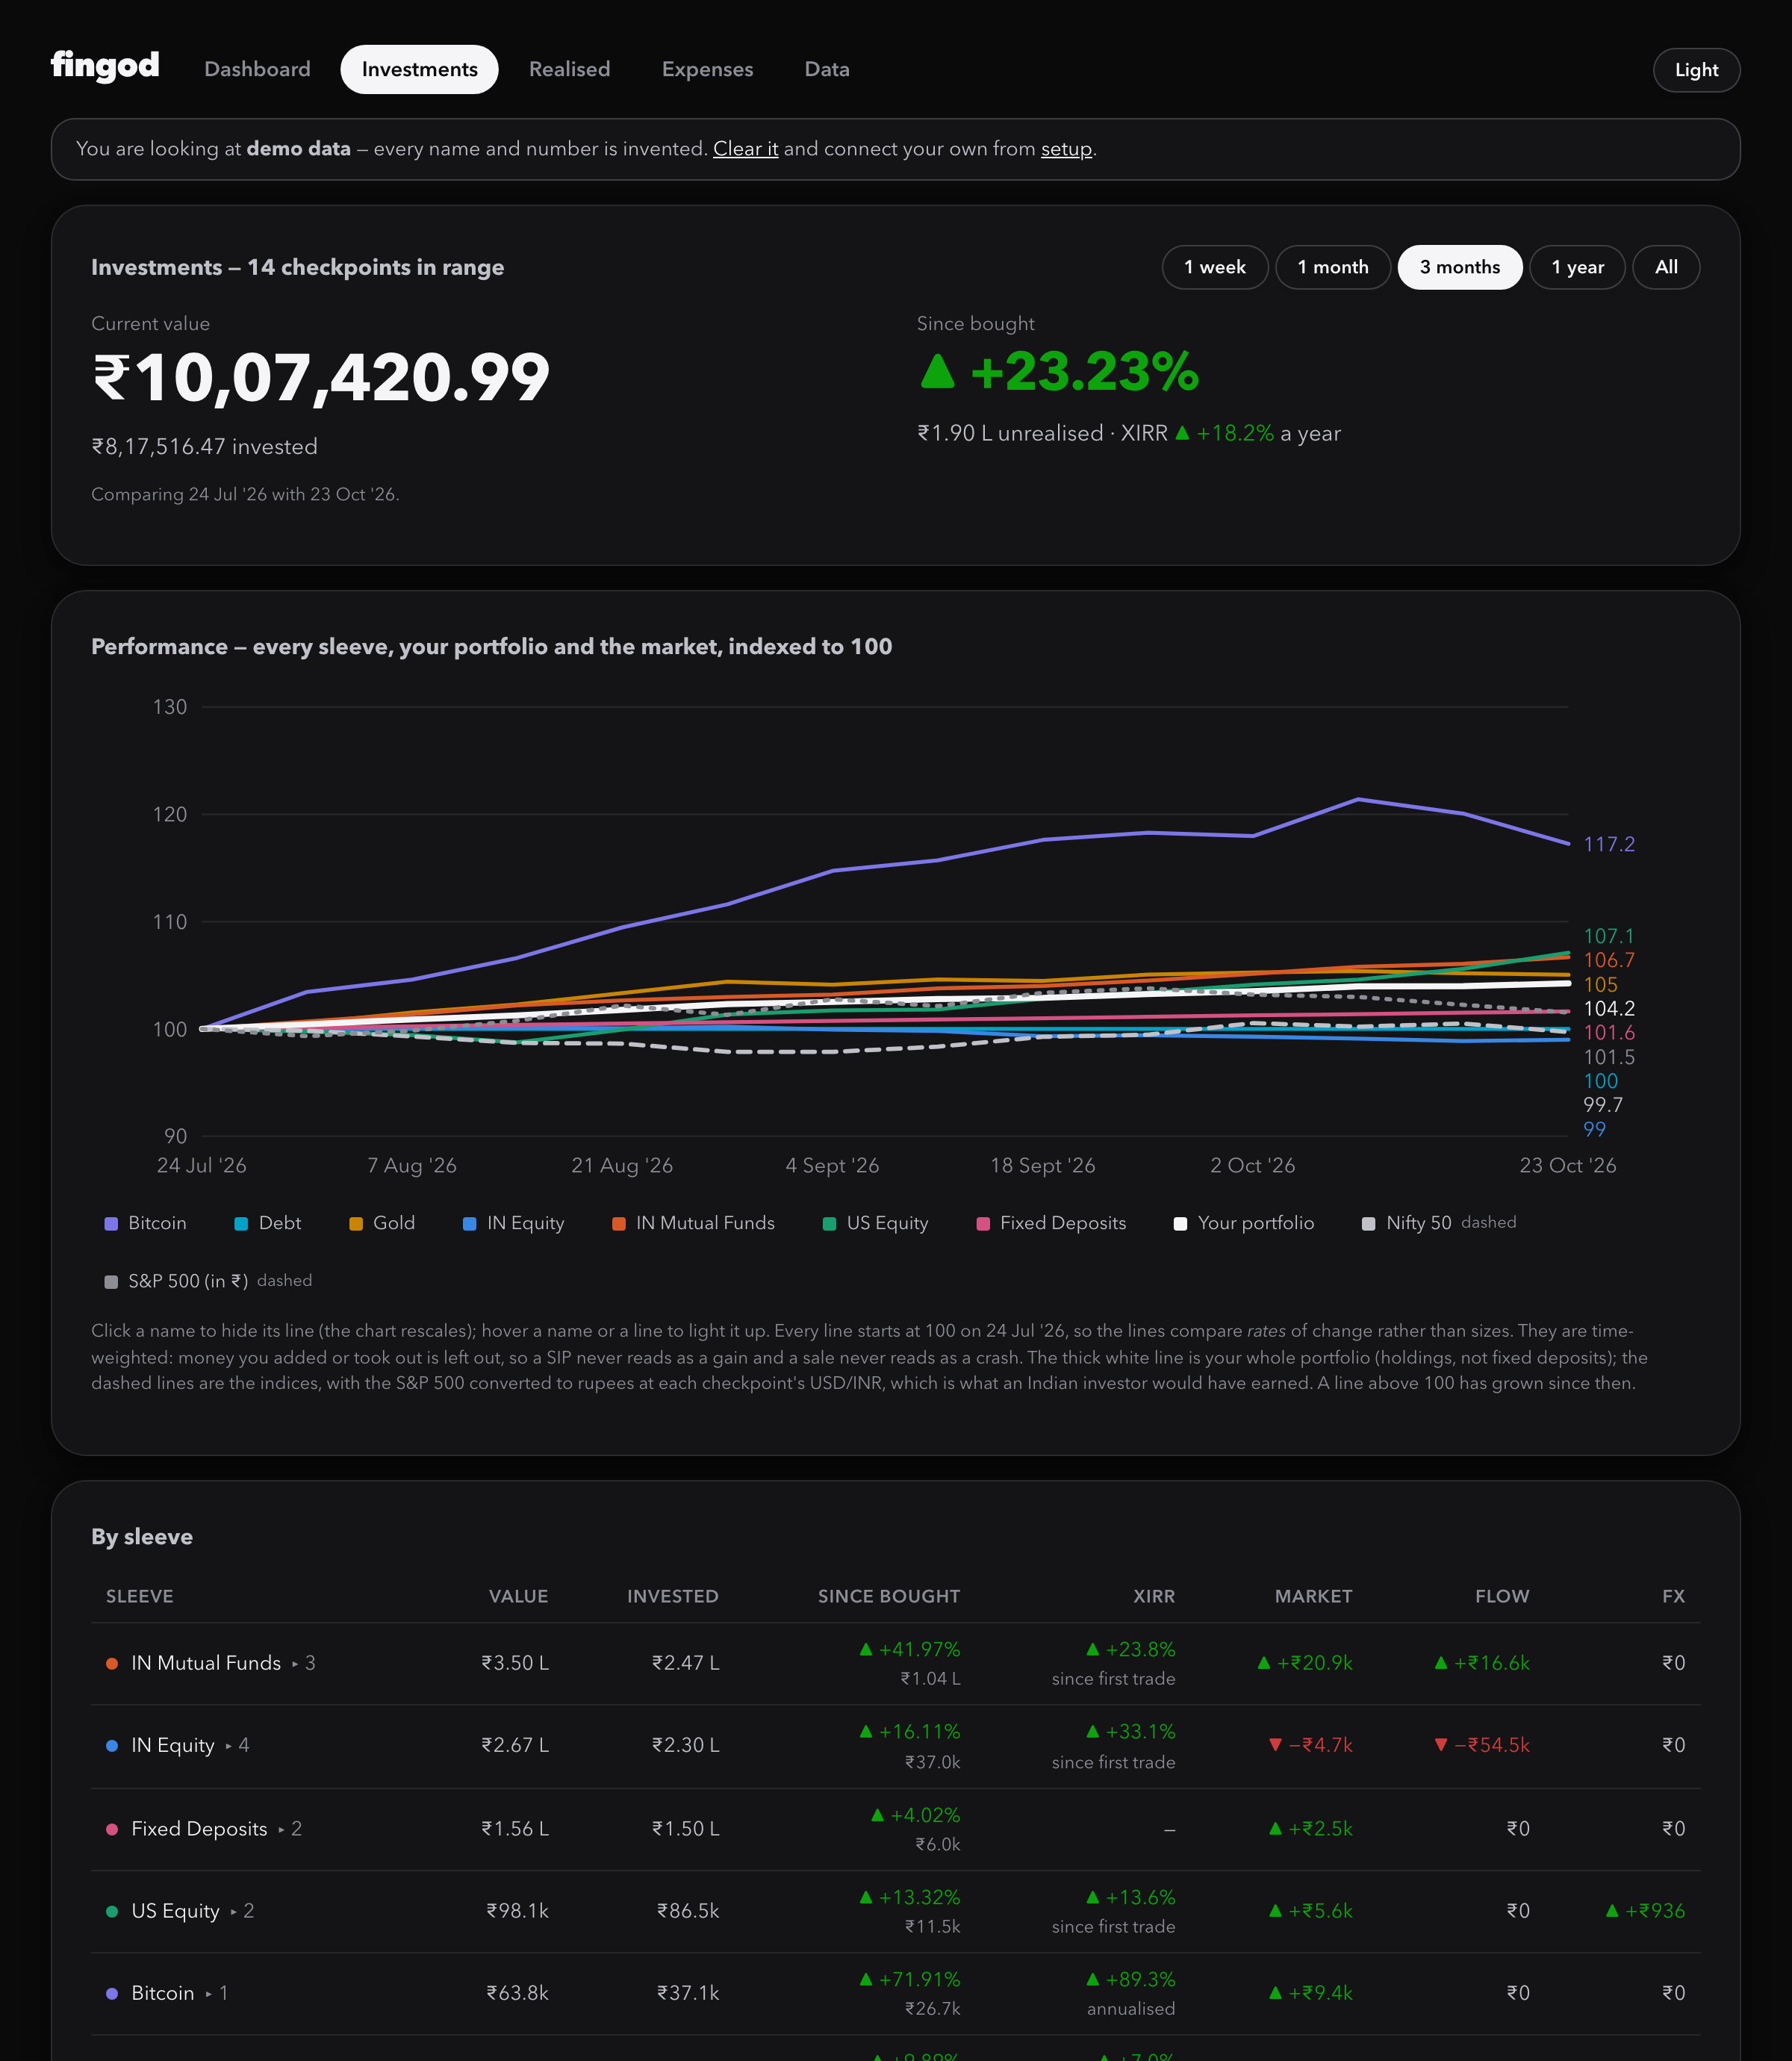
Investments: every asset on one axis, with each change split into market, flow and FX.
> Set up fingod for me, a local-first net worth tracker…

● Which of these apps do you use?  (select, then submit)
  ◉ Wallet        expenses, cash, credit cards
  ◉ Zerodha Kite  Indian stocks and funds
  ◯ Groww         Indian stocks
  ◉ INDmoney      US stocks, EPF

● Connecting Kite. Click to log in. Read-only: no orders.
  Login to Kite  https://mcp.kite.trade/authorize?…

● Wrote data/checkpoints/2026-10-29.json. Opening your
  dashboard.  open http://localhost:8000  ✓ opened
Setup happens in your terminal: pick options, submit, and your agent connects and writes your data. (Illustrative session.)
Growth, split honestly
Every change is separated into market, money you added, and currency. A ₹50k SIP never masquerades as ₹50k of gain.
Two net worth numbers
Liquid is what you could act on. Total adds EPF, accrued FD interest and what friends owe you.
Read-only, and yours
Nothing is ever traded. Your data lives in your browser's own SQLite database, and a gitignored folder on your machine.
Three steps. Your coding assistant does the typing.
fingod can't log in to your accounts from a web page, and it shouldn't. Your assistant does that on your machine and hands the app plain files.
Clone the repo and start your assistant inside it. One command.
Your agent asks which accounts you use with selectable options, right there in the terminal.
Pick your options, submit, and log in when asked. Your dashboard opens in your browser once everything is connected.
Set up fingod
git clone https://github.com/HarishTeens/fingod.git && cd fingod && claude
Starting inside the folder is what lets Claude Code load the project’s MCP servers. It asks you to approve them once.
Using Wallet? export WALLET_MCP_TOKEN=<token> first (Wallet app, Settings, MCP). Any other agent with shell access and MCP support works the same way.
Read the prompt first
Kite's connector needs Node 20.18.1 or newer. If node -v is older, nvm install inside the folder picks up the right one.
git clone https://github.com/HarishTeens/fingod.git
cd fingod
python3 -m http.server 8000 --bind 127.0.0.1     # then open http://localhost:8000 and choose “Explore with demo data”
Before you paste it.
Is my data safe?
Your finances never leave your machine. The app runs in your browser and stores everything in a SQLite database in that browser. The files your assistant writes go into a data/ folder that git ignores. There is no account, server or analytics.
Can it place trades?
No. Every connector is read-only, and the instructions forbid order tools outright. Kite's server exposes them; fingod never calls them.
Which assistants work?
Claude Code, Codex CLI, Gemini CLI and Pi are set up out of the box: the repo ships each one’s project MCP config (.mcp.json, .codex/config.toml, .gemini/settings.json, .pi/mcp.json) and instructions (CLAUDE.md, AGENTS.md). Any other assistant with shell access and MCP support can follow the same prompt.
Why start the assistant inside the folder?
An assistant only loads a project’s MCP servers when its session starts in that folder, and you approve them at that moment. Cloning first and starting the assistant from inside it means the whole setup runs in one session, with nothing to restart.
Do I need every connector?
No. Pick the ones you use. Bitcoin, fixed deposits and Splitwise are just typed in. You can also look around first with the built-in demo data.
Why does it need Python?
Only for serve.py, a tiny static file server. Browsers won't load WebAssembly from a plain file, and the server also lets the app see the folder your assistant writes to. There is no backend and nothing to install.
What does it cost?
Nothing. It's open source under the Apache 2.0 license.